|
|
|
|
|
|
|
|
|
Research Notes 2018
| December 2018 - Widecombe |
|
1)
The
Church Way - (SX668/787
to SX717/769) Not
far out of Widecombe, on the Natsworthy road, a tarmac lane strikes
westwards climbing steeply between hedge rows towards the southern end of
Hamel Down. Halfway up, on reaching a gate, it becomes a stony, grass
covered cart track. The lower, Widecombe end is Church Lane whilst the top
is referred to as Church Lane Head. This lane is part of an ancient track
called the Church Way. People
who lived in the heart of Dartmoor were required to carry their dead over
The Lichway/Lych Way to the moorland’s capital parish church of St
Petroc's in Lydford for Christian burial. For
the tenements of Babeny and Pizwell in the east central basin the most
direct route to that parish church was about 12 miles under favourable
conditions but during adverse weather travellers were compelled to use a
more arduous and consequently less direct route which added a further 5
miles to their toils. Therefore, in 1260, the easterly Ancient Tenements
successfully petitioned Bishop Walter Bronescombe of Exeter for permission
to attend the much nearer Widecombe church for all sacramental purposes,
whereupon the Church Way began to receive regular use, and the vicar of
Widecombe to receive tithes which properly were due to the rector of
Lydford. The
Church Way has two routes to Widecombe-in-the-Moor. The main one runs east
from the Moreton to Two Bridges highway taking in Pizwell and Runnage then
passing Ephraim’s Pinch to reach Grendon Bridge. It then passed
Blackaton and crossed Broadaford Brook before ascending Gore Hill to
attain the commons on Hamel Down’s southern end and finally enter Church
Lane Head. A
secondary path of later origin ran from Headland Warren via Challacombe to
Blue Gate where it traversed diagonally through the enclosures on the
western slopes of Blackaton Down before joining the path from Pizwell and
Runnage at the top of Gore Hill. The
inhabitants of Babeny used a route to Widecombe (referred to as the
Sherwell Church Path) that went via Sherwell and over Corndon Down to
Shallowford Bridge. From there they would cross Rowden Down and make for
Two Crosses on Dunstone Down before descending past Southcombe to take the
Ponsworthy road in to Widecombe. (Sources:
W. Crossing & E. Hemery). 2) Grey Wethers Boundary Stone - (SX7108/7888) The Grey Wethers Boundary Stone is a large squarish natural rock on the top of Hamel Down and quite close to Coal Mires. Its name was formerly 'The Greystone', which was a term used in Saxon Charters to refer to a stone of some importance used as a boundary mark. The stone is engraved with 'D. S. 1854' on its eastern face, which represents the Duke of Somerset and the date it was first used as a boundary stone. This is one of a number of boundary stones along the top of Hamel Down to mark the boundary of the Duke's Natsworthy Manor grounds, quite a few of which have been individually named and are set on the top of the various barrows. The name 'Grey Wethers' should not be confused with the other 'Gray Weather' boundary stone, which lies about 1 mile north-north-east of this stone and is another of the Duke's Natsworthy Manor boundary stones. (Source: Dave Brewer's 'Dartmoor Boundary Markers', pages 83-4). 3)
Hamel
Down Liberator Air Crash Site - (SX709/794) On
27th December 1943 Consolidated B-24D 42-40474 of the 36th Bombardment
Squadron/482nd Bombardment Group of the United States Army Air Force had
taken off from Alconbury Air Station, near Huntingdon, in Cambridgeshire
at 08:44hrs and was on the third leg of a training flight for Operation
Carpetbagger: this being the code name for European missions involving the
aerial deployment of British SOE agents plus supplies to aid the
clandestine war against occupying forces. This
part of the flight plan was to head out to Bude Bay, after passing over
Taunton, to a point 10 miles out from Hartland Point before returning to
base. However, the aircraft had veered some twenty miles south from the
intended course when it flew into the cloud covered hillside at
approximately 10:45hrs and burned out, killing all eight crew. The
only crash evidence remaining is a few pieces of melted aluminium in a
grassy patch on the heather covered slope. Parts of the Liberator are on
display at the RAF Memorial Museum in Davidstow, Cornwall.
The 'L Corner' stone, also known as 'L Stone' or 'Ell Stone' is situated close to the boundary wall below Chinkwell Tor and just below the bridlepath that runs from the Natsworthy Manor road to Bonehill Rocks. The stone is inscribed with 'L Corner' and is another in the series which marks the bounds of the Duke of Somerset's Natsworthy Manor. It is thought the stone was named after the adjoining 'Ell Field', which is where the trees have been planted on the other side of the wall. (Source: Dave Brewer's 'Dartmoor Boundary Markers', pages 83).
|
| November 2018 - Haytor (lower) Car Park to Bovey Tracey (Templer Way) |
|
1) Templer Way - (SX7615/7775 to SX938/728)
George Templer, son of the younger James, succeeded in the Estate from 1813 and it was he who commercially developed the quarries at Haytor. His major contract was to provide stone for the construction of the new London Bridge, which was completed in 1831. In being able to supply the large quantities of granite as required by his contracts, George had to find a more practical solution to transporting the granite away from the quarries. His main problem was to negotiate a 1,300 feet drop in height over the seven miles from Haytor to the start of the canal, at Ventiford. The innovative solution he came up with was to build a tramway, which was a first for Devon at that time. As there was no suitable supply of iron available in the County to make the tracks, his solution was to use local blocks of granite with a rebate cut out to keep the wheels on track. The tramway was opened in 1820 and ran successfully until the 1850's, by which time other moorland quarries, in the Merrivale - Princetown area, could produce vast quantities of granite and transport it more easily and cheaply on the Princetown railway. By this time the tramway and canal had been sold to the Duke of Somerset, who closed the tramway and leased a shortened length of canal to a clay company. The tramway covers several quarries in the Haytor/Holwell Tor area and the rails are serviced by a number of points where the various branches diverge from the main track. The tramway negotiates the south eastern corner of Haytor Down, goes through Yarner Wood, down through Lowerdown Cross, along Stentiford Lane, through Bovey Tracey and Bovey Heath to join up with the start of the canal at Ventiford. Extended sections of the tramway are clearly visible on the moorland section but, once off the moor, the rails are less visible although short sections can still be seen in various places along the route. (Source: Helen Harris 'The Haytor Granite Tramway and Stover Canal', pages 6/7). 2) Perryman's Bridge Boundary Stone - (SX7805/7739)
3) Cavalier Cross - (SX8100/7785) Information about the Cavalier Cross can be found on our Dartmoor Crosses website.
|
| September 2018 - Bennet's Cross |
|
1) Hurston Ridge Stone Rows - (SX6726/8244 to SX6732/8257)
A little way down the stone rows a line of earth-bound rocks lie at a right angle across the rows. These are the remains of a Bronze Age enclosure which was built across the line of the stone rows, but at a later date. This enclosure spanned an area of 2.9 hectares and the remains of six hut circles have been found inside the boundary walls. The builders must have held the stone rows in respect, rather than awe at this time, causing minimal damage even though the stones would have been useful in constructing the wall of their own enclosure. (Source: Jeremy Butler's 'Dartmoor Atlas of Antiquities - Volume 2', pages 30/31). 2) Assycombe Hill Stone Rows - (SX6610/8265 to SX6601/8259)
With a gradient of about one in six, Worth records this as the steepest stone rows on the moor. Similar to the Hurston Stone Rows, there is another row of earth-bound stones crossing the rows about half-way down the hill. It is thought that this is a prehistoric bank that is contemporary with the hut circles in the area. In building this bank, care was taken not to use or destroy any of the stones in the rows, except that the immediate stones may have been moved back slightly so as not to damage them. About three metres to the south of the bottom end of the row is a well preserved hut circle. With a diameter of 8.5 metres, it is thought that this is the largest of the eight hut circles in the area. It was excavated by Baring-Gould and Burnard in 1894 in an attempt to see if there was any relationship between the stone rows and the hut circle. However, they were disappointed to find that it had already been dug up as a source of stone and they finished up restoring part of the wall. (Source: Jeremy Butler's 'Dartmoor Atlas of Antiquities - Volume 2', pages 157 & 166). 3) RAF
Radio Direction Finding Tower -
(SX6582/8030) The
low octagonal structure lying in the middle of the track on the top of
Meripit Hill is understood to be the base of an RAF Radio Direction
Finding tower from the Second World War, the purpose of which was to
broadcast radio signals to aid aircraft navigation. A search for further
evidence and verification has proven fruitless with the exception of
another point of reference suggesting it was an observation post. Further
down Meripit Hill, in a south-easterly direction, are the scant remains of
some additional concrete foundations, possibly on which stood huts or more
substantial buildings occupied by the personnel who operated the
tower. Unfortunately nothing in the form of photographs or diagrams
has been found to show what the station might have looked like or whether
the tower was fixed or rotatable. (Source:
DartmoorCam
website).
|
| August 2018 - East Okement Farm (Ring Road at OP22) |
|
1) A Shell Crater and an 18-inch Gun -
(SX6016/9095) The
following paragraph is an extract from a MoD publication: “In 1940 an 18-inch gun removed from HMS Furious
and fitted to a railway carriage was fired from North Tawton Station.
Locals say that the shell sounded like a dustbin rumbling overhead before
exploding near OP22. The massive shell holes can still be seen near OP22
at SX601910.”
During
construction, with only the rear turret in place, the ship was further
modified to become an aircraft carrier. The space destined for the forward
gun was converted into a large hanger and a 160-foot flight deck built
along its roof. Commissioned in June 1917 firing trials with the aft gun
indicated it produced more stress than the ship could handle. Being
returned to her builder five months later that turret was removed whereby
a second hangar was installed and a 300-foot flight deck for landing
aircraft fitted over it. Further events unfolded which have no bearing on
her guns but, to close the curtain on HMS Furious, following a brief layup
after WW1 the vessel was reconstructed in the early 1920s with a
full-length flight deck. During WW2 much of her time was spent operating
in the Mediterranean and off the coast of Norway as well as in the
Atlantic and on the Arctic convoys. The ship was decommissioned in April
1945 and sold for scrap in 1948. Many
ideas and suggestions had been put forward for the deployment of HMS
Furious’ unused 18-inch guns but they ended up on two monitor class
vessels - ‘General Wolfe’
and ‘Lord Clive’ - for coastal bombardment duties.
Monitors were one of several types of ship developed for the Royal Navy
during WW1 to give close support to troops ashore. Although termed
"monitors", they owed little to the designs of the 19th century,
but did share the characteristics of poor seaworthiness, shallow draft and
heavy armament in turrets. So,
herein lies a rub. Are the date and the gun hypothesis correct? All three
18-inch naval guns were removed from service in December 1920 for use in
cordite tests. Two were used at artillery ranges in the Thames Estuary,
but scrapped in 1933, with the third lined down to 16 inches in the early
1920’s and remaining in use until 1942 then scrapped five years later.
This implies that no 18-inch gun from HMS Furious survived to be involved
with the Dartmoor ‘shoot’! However,
what has come to light is Elswick Ordnance developing an 18-inch
rail-mounted howitzer during WW1 (at the same time as two 14-inch cousins)
which did not enter service until 1920. It was subsequently put into
storage because there was no use for such large but relatively
short-ranged weapons. Five were mentioned as being manufactured (although
another source states two) plus two complete rail mounted “equipments”
which carried the names HMG Boche-Buster and Scene-Shifter, both seeing
service in France during WW1 with the 14-inch guns. Each 18-inch howitzer
(including breech) weighed 85¾ tons and was 52 feet long. They fired a
shell weighing 2,500 pounds, had a muzzle velocity of 1,880 feet per
second and an effective firing range of 22,300 yards. In
late 1940, with the unfolding situation of WW2, rail mounting HMG Boche-Buster
(having been neglected for fourteen years) was relocated and had one of
the 18-inch howitzers fitted to it. Manned by fifty men and several
specialist gunnery officers from the 2nd Regiment Royal Artillery (RA) it
had a complete operating team of eighty personnel who were known as the
11th Super Heavy Battery. The gun was deployed at Bishopsbourne in Kent, on the Elham to Canterbury Line,
as a precautionary coastal defence measure against possible German
invasion and fired for the first time, after initial training, on 13th
February 1941 sending several rounds into the English Channel. Although
villagers had been warned to open all windows, considerable damage was
caused in Kingston and Barham by the shock waves which brought down a
number of ceilings. As a result, only two other test firings were made.
Apart from blast damage the track had to be strengthened every time it was
fired. Recoil, although cushioned by the rail-mounted gun-carriage, was
capable of pushing the entire unit backwards by several metres. The gun's
range was insufficient for cross-Channel firing and hence never fired in
action. Boche-Buster found its way back to Salisbury Plain in 1943 for new
“anti-concrete shell” trials. By year’s end all the railway guns had
been withdrawn from the Elham Valley and their units disbanded. Although
the anti-invasion guns were to spend long months waiting on the sidelines
their fire-power would have been a significant factor in any ensuing
battle. Seeing
the howitzer was test fired for the first time in February 1941 and only
reinstated the previous year the MoD’s claim of being fired towards
Dartmoor in 1940 is at odds. What of the named locations of North Tawton
and Halwill Junction? How and when did it travel to Devon? The unit was a
high-angle Howitzer with an elevation of 40° but a traverse of only 2°
(it had to be fired in a direction almost parallel to the track). At North
Tawton, although there were sidings, the railway has an east to west
alignment making it impossible for the gun to be aimed towards OP22
(although easily in range at 5½ miles). The first point on the line at
which such an angle could be achieved is near Sampford Courtney Station.
Photographic evidence does exist of the howitzer at Halwill Junction in
May 1944 when it was stabled in sidings (now the site of a primary school
and playing fields) opened by the War Department the previous September as
part of the run-up to the D-Day Landings of June 1944. These sidings had a
north to south alignment which again was unsuitable for aiming. The only
locations on that route providing a suitable line of fire would have been
near the long vanished station for Ashbury (SX 48357 96310) – from where
Okehampton training grounds are 8 miles distant. This fits with access to
Halwill Junction’s sidings. A couple of black & white photos were
taken in the vicinity of Ashbury (one is inset in the photo presentation)
on 10th May 1944 on the occasion of an exercise recorded by the Southern
Railway Film Unit; the film is now in the care of the Imperial War Museum. To
be considered is that in moving from North Tawton to Halwill the gun would
traverse an arc and thus be able to take aim at its target from only one
of the two locations, there being no facility to turn the gun carriage
through 180°. Also, that Meldon Viaduct had to be crossed. With just the
complete rail gun unit having a stated weight of 250 tons - mounted on
four bogies comprising fifteen axles - it is unknown what limits the
bridge structure was design to support as the heaviest railway locomotives
permitted to use it, the rebuilt West Country Class of 1955, weighed in at
just over 91 tons. To be considered is the possibility of reaching Halwill
from the direction of Barnstaple by coming down via Torrington, but that
section was laid as a ‘light railway’ and thereby doubtfully capable
of handling such a heavy load. Finally, what contingence plans were in
place for misfires when considering the positions of villages and farm
land beneath the direction of firing? There was also no mention of blast
damage with the Dartmoor outing. After
WW2 Boche-Buster was taken to the Royal Arsenal and cut up in the early
1960s. No railway guns exist today although one of the 18" howitzer
barrels has been retained and fitted to a purpose built proofing carriage.
It was loaned to the Dutch national rail museum, the Spoorwegmuseum,
in March 2013 and is currently on display at the Royal
Armouries Artillery Museum, Fort
Nelson, Hampshire. 2) Rifle Butts (Experimental Parapets and Redoubt) - (SX5985/8932) The modern military use of the moor dates back to the late C18 when it was used to train the Okehampton Militia. By the early C19, soldiers guarding Dartmoor Prison used the moor for training, and troops garrisoned in the Palmerston Forts in South Devon used Dartmoor by the mid-C19. In the late C19, probably in response to the tactics employed by the Boers during the wars in South Africa, trenches were dug, principally to determine methods of attacking these defensive positions. Further earthworks were created to facilitate training including earthen parapets and redoubts. An imaginative firing programme was also established with the addition of an extensive system of static, moving and disappearing targets. These were intended to represent advancing infantry, cavalry and guns. The targets were moved in a variety of ways including horses pulling targets on tracks, ropes, pulleys and sledges. Earth and granite covered concrete, splinter-proof shelters were also built to facilitate the observation of the artillery training and to instruct on the movement of targets. Some have subsequently been demolished, and those that survive remain in use as training features with the exception of Observation Post 22, at the corner of East Okement Farm, which is still used to observe manoeuvres. The
experimental parapets consist of a line of four banks, positioned end to
end in a north-west to south-east line between SX 5985/8932 and SX
5994/8922. Four corresponding ditches lie immediately behind (south-west).
The banks are, on average, just under 30m long and measure between 3.5 to
5.5m wide and around 1.5m high; the ditches are 2.5 to 3.5m wide and just
over 1m deep. The most south-easterly bank also has a ditch in front
(north) that is 2.6m wide and 0.6m deep. Behind this line, to the south,
is a similarly oriented, disturbed bank and accompanying ditch between SX
5984/8926 and SX 5987/8922. Further south still, between SX 5984/8931 and
SX 5986/8929 is another, longer (circa 60m), bank and ditch. All the
features have sharply defined edges except where damaged by shell fire.
There has been some damage to the banks. In addition two utility trenches
are known to have been placed through the front line of the parapets.
The parapets and redoubt is now a protected area, as scheduled under the
Ancient Monuments and Archaeological Areas Act 1979. 3) Ockerton Cut (Peat Pass) - (SX6030/8690 to SX6014/8696) For further information on the Dartmoor Peat Passes, please see the notes written up for the Winney's Down Peat Pass in June 2015. Unfortunately, this peat pass does not have the normal granite marker stones at each end, with the metal plaque setting out the purpose of the passes and the dedication to Frank Phillpotts. However, a simple wooden post still stands at the western end of the pass at Grid Ref: SX6014/8696. This may be the original post that was put in place when the pass was cut over 100 years ago, as there is no evidence to suggest that it has since been replaced. 4) Black Ridge Peat Pass - (SX5977/8586 to SX5953/8488) For further information on the Dartmoor Peat Passes, please see the notes written up for the Winney's Down Peat Pass in June 2015. Fortunately, this peat pass does have the normal granite marker stones at each end, with metal plaques setting out the purpose of the passes and the dedication to Frank Phillpotts. 5) Metalwork on Harter Hill - (SX6005/9090) Just to the west of the track going south from the car park at OP 22 (East Okement Farm), there are two metal objects pegged into the ground about 3 feet apart. They look like brackets with a flange, under the surface of the ground, at each end which is pinned down with metal spikes. The top of the metal spikes are spherical, probably to facilitate hammering them into the ground. A photo of these brackets appears as number 25 in the Flickr presentation of the August 2018 walk. Although we've tried to discover their purpose on the moor, I'm afraid that we've not been able to come up with any explanation at all! We did wonder whether they had any connection with the now defunct Military Target Railway that existed to the east of East Mill Tor? It is also possible that they were used to pin some electric cables, telephone cables, water pipes and such like in place, but there is no actual evidence to suggest that this was the case. I'm afraid that, as of now, we don't have any explanation for them but, hopefully, something may crop up in the future when it will all become clear!
|
| July 2018 - Hexworthy (behind the Forest Inn) |
|
1) Whiteworks Mine - (SX612/710) According
to evidence in stannary
rolls, tin working at Whiteworks goes back to 1180 when it was associated
with mediaeval field systems on the eastern edge of Fox
Tor mires. At 1,200 feet above sea level Whiteworks became, during a
period in the 19th century (accompanied by drainage work designed to make
Fox Tor Mire safer), one of the largest tin mines on Dartmoor. It is
recorded that at least twenty-two lodes were worked from three or more
shafts using three horse whims and three waterwheels. Also known as
Whiteworth, Wheal Industry and Great Whiteworks, consensus for its name
arises from the high quality of ‘white’ tin yielded after processing
the ore (Hemery),
or from the knowledge of clay in the neighbourhood suggesting the granite
there was somewhat marked by kaolinization. (Worth) Amidst evidence of bygone times Whiteworks was apparently recorded, in varying degrees, as active from the mid-1780s to the early 1900s; supposedly so around 1790 when the Industrial Revolution fuelled demand for tin and provided the technical changes to previously impossible methods on the difficult moorland terrain. However, with no smelting houses operating in Devon tin ore was initially sent to Calenick, near Truro, for smelting. Needing a reliable supply of water to operate the waterwheels a leat was cut across the southern side of Fox Tor Mires during the latter two decades of the 18th century. Its neglected channel contours a route westward from Swincombe and, after augmentation from the Fox Tor Stream, T Gert Stream and the combined waters of Wheal Anne Stream and Nuns Cross Brook, turns north and then north-east around the slopes of the mire to reach Whiteworks. Four additional leats were taken off of the Strane River. Depending
on sources of information, facts for Whiteworks Mine tend to vary with one
another: In
1818 two water-powered stamping mills and a pumping wheel were in
operation. Mining continued irregularly from being important in 1820 to
closure in 1826 only to be operating again in the 1860’s. A
forty-six foot waterwheel, purchased in 1869, was sited at SX 6155 7075 to
drive the vertical lifters of sixteen head of stamps for tin ore crushing,
whilst the pit for another waterwheel can be found near SX 6130 7082. Records
report that at the beginning of the 1870s the mine produced little tin; as
an example eight to nine tons
of ore per year. The period 1870-71 saw twenty-nine tons of black tin
amassed with a further eighty-six tons (or ninety-six tons, depending on
the information source) being raised during the ensuing years leading to
the works closure around 1876. At this time it was owned by the Tavistock-based
mining entrepreneur Moses Bawden. Two of the waterwheels were still in use
prior to the period of abandonment.
By the 1880s the mine was disused, although a revival of ore
values at the beginning of the 20th century caused a brief resurgence of
activity which ceased completely in 1914. In
1880 two thirty foot wheels and the forty-six foot wheel were recorded as in
situ;
the latter wheel with its abandoned stamps being photographed by R. Burnard
in 1889 and still there a year later. His photograph shows what looks like
an elevated launder approaching the wheel from the north-west, but on
closer inspection it seems to go behind the wheel suggesting it could have
been a raised tram road for transporting ore to the stamps. In
its final years Whiteworks was under shared ownership with Golden Dagger
Mine and Hexworthy Mine. Around
the turn of the 20th century, a new farmhouse had also been constructed
and with the cessation of mining activity, the land around the works was
increasingly used for livestock farming and breeding animals such as
ponies. Subsidence
during 1942 caused further obliteration to the old workings and some forty
years later the site had been mostly abandoned with some of the buildings,
including the farmhouse, demolished by the National
Park Authority. Of the terrace of cottages that remain the easterly
one was formerly occupied by the mine captain. They are now owned by
Plymouth College and used for outdoor activities. Other
buildings, related to previous mining or farming activities, lie in ruins,
interspersed with the fenced and walled-off remnants of mine shafts. The
road reaching out to Whiteworks is an extension to one constructed for
access to Sir Thomas Tyrwitt’s property of Tor Royal. It is now named
Tor Royal Lane at the Princetown end but would seem to have been formerly
known as Castle Road. In
John Robins’ book ‘Follow the Leat’ he writes of the bounds to
Whiteworks being marked with inscribed stones - ‘WI’, ‘WII’ and
‘WIII’. The positions of these markers were specified in a Duchy
licence granted to W. Thomas and H. White in 1836, but they have never
been found. Dave Brewer commented from correspondence he had that when a new reservoir was proposed in the Swincombe Valley in the late 1960s the boundary stone ‘WII’ was mentioned in papers prepared by the Water Authority and around that time a wall was being repaired in the vicinity. The person superintending the repair work had spotted this stone but whilst having cause to be elsewhere, his workman incorporated it into the wall with most probably the inscribed face hidden forever from view. (Sources: Authors - D. Brewer, J. Butler, W. Crossing, T. Greeves, H. Harris, E. Hemery, P. Newman & R. H. Worth - Internet - Devon in Focus & Wikipedia). 2) Whim Plat - Whiteworks - (SX6114/7088) This
marks the location of a horse whim or ‘gin’: a device for hoisting
‘kibbles’ (large egg-shaped iron buckets) up and down a mine shaft.
Some water-powered hoists have been recorded on Dartmoor but the most
common were horse driven. Positioned
adjacent to a shaft, the ‘whim’ comprised a perpendicular axle with a
large horizontal cable drum (known as a cage) mounted on its top. Rotation
was enabled by horses being harnessed to the whim and walking in a circle
around the axle; the whole structure supported by a wooden frame. From the
‘cage’ a horizontally wound cable extended over a flanged wheel
supported by a head frame set over the shaft, down which the kibble could
pass. Subtle, yet distinctive, field evidence for these devices is a flat, circular earthwork platform of between 12.5m and 6.5m in diameter, either on a raised mound or in a cutting forming a crescent shaped scarp set into a slope. Often a flat stone (the mellior) with a small hole in its upper face is found in the centre of the plat in which the axle was supported. Hauling shafts can often be recognised by the massive size of their spoil heaps which sometimes radiate from the shaft head like fingers or take a spread, flat-topped form. (Source: P. Newman). 3) Goldsmiths' Cross - (SX6166/7015) Information about Goldsmith's Cross can be found on our Dartmoor Crosses website. 4) Childe's Tomb - (SX6257/7029) Information about the cross on Childe's Tomb can be found on our Dartmoor Crosses website. 5) Mount Misery Cross - (SX6366/7059) Information about the Mount Misery Cross can be found on our Dartmoor Crosses website. 6) Ter Hill (SW) Cross - (SX6403/7062) Information about the Ter Hill (SW) Cross can be found on our Dartmoor Crosses website. 7) Ter Hill (NE) Cross - (SX6412/7064) Information about the Ter Hill (NE) Cross can be found on our Dartmoor Crosses website. 8) Skir Ford Cross - (SX6547/7142) Information on the Skir Ford Cross can be found on our Dartmoor Crosses website. 9) Down Ridge Stone Circle - (SX6550/7207) This stone circle was once one of the most spectacular on the moor, but it has now been so badly damaged that less than a quarter of its original circumference remains. Only four stones in the south-east quadrant are still in place, one of them a massive slab 2.8m long by 1.7m high supported by a backing stone which shares its neighbour to the west. On its other side are two large but fallen slabs 2.5m and 1.7m long which must have been in contact when erect and a buried pillar-shaped stone 2.5m long. At least twelve fallen and partly buried blocks scattered down the hill may have been components of the circle and dragged out of position. One stone on the north-east perimeter and close to a shallow pit, which was perhaps its socket hole, may have fallen more recently than the rest. The diameter of the circle would have been about 25 metres, but too little remains to estimate the original number of stones or their arrangement. The interior is quite flat with little sign of the 'pits and trenches' cut by the Dartmoor Exploration Committee in 1904. Their excavations revealed that the circle was once the site of great fires, like other stone circles on the moor, with the original ground surface being found strewn with charcoal. (Source: Jeremy Butler's 'Dartmoor Atlas of Antiquities Volume 4 - The South-East', pages 201-202).
|
| June 2018 - Dartmoor Inn (Lydford) |
|
1) Widgery Cross - Brat Tor - (SX5395/8559)
With regard to William Widgery and his son Frederick, William was born to a humble family in North Molton in 1826. Aged fourteen he was manservant to a mason in the same village and within ten years had likewise become a mason. By then, married and with a two-year-old daughter, he was living in a court off Paul Street, Exeter. He
took up the pastime of painting, initially copying the works of others,
being entirely self-taught and receiving no formal art training. Growing
in confidence from the encouragement of friends it was not long before he
was painting in his own style whilst venturing out in the local
countryside. William’s
younger son, Frederick John (1861-1942) also ‘took up the brush’. 2) Arms Tor - (SX5416/8624) On the edge of the summit (main stack?) is a rock-basin approximately 11 inches in diameter, whilst near the tor's east pile, on its south side, lies a part-worked mill-stone of 4¾ feet diameter. (Source: Hemery's High Dartmoor). 3) Great Links Tor - (SX5508/8676) In
1862 Charles Barrington (Duchy of Cornwall Office & High Bailiff of Dartmoor) rejected a
request from the lessee of Foggintor Quarry to discuss large-scale
granite-quarrying involving the tors Great Links, Bra, Arms and the
Dunna Goats. It makes one wonder what the moor-scape would have looked
like in the vicinity if the plan had gone ahead. To the south of the main rocks of Great Links Tor stands a 6 foot tall menhir-like boundary stone. Although this stone does not bear an inscription, it was placed here to mark the limit of the Rattlebrook Peat Works area. The Peat Works were first recorded in 1868 and, in 1878, the Compressed Peat Co. Ltd. were granted a lease to work an area of approximately one square mile, taking peat mainly from the slopes of Amicombe Hill on the opposite side of the Rattlebrook. The area covered by the lease must have extended as far south as the River Tavy, as William Crossing recorded another Peat Boundary Stone at the point where the Western Redlake falls into the River Tavy, but this stone has long since disappeared. (Source: Dave Brewer's 'Dartmoor Boundary Markers', page 200). 4)
Dick’s Well Pits - (SX551/860) A
tinner’s cache is located in a gully near the Bridestowe, Sourton &
Lydford boundary stone, whilst a second, formed from large boulders, is
sited on the left bank a short distance below Doe Tor Brook’s confluence
with another stream flowing in from the ESE. To supplement the
requirements of the upper mine workings a square reservoir 18m across and
2m deep was constructed just below Dick’s Well (SX 55060 86027) to
provide a leat head. Further downstream a mine leat, spanned by a
vegetation concealed clapper, leads to a masonry-built launder-bank and
the previously visited remains of Foxhole Tin Mine. A track also leads
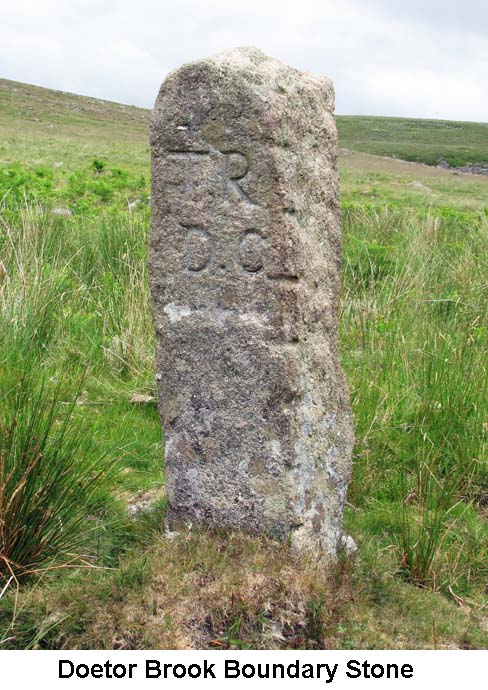
upstream from the mine to cross the brook via a clapper of eight imposts. 5) Willsworthy Firing Range - (SX5300/8345) The land for the Willsworthy Firing Range was purchased outright in 1903 from the Calmady-Hamlyn family of Willsworthy Manor. The boundary line of the firing range, which covers some 3,200 acres, closely follows that of the former farm, with a few slight variations. The range boundary was marked by a series of 46 square-cut boundary stones, with each one bearing the inscription 'W D', followed by its number. The stones were supplied, cut and set into position by Fred Palmer of Lane End Farm from granite found in the Nattor Down area. The whereabouts of the missing stone 'W D 17' is a real mystery. On the one hand stones 'W D 16' and 'W D 18' are situated relatively close together and it seems pointless to have another stone placed between them. However, there is a theory which says that, at one time, the boundary deviated from 'W D 18' at Wallabrook Head up to Sharp Tor, where 'W D 17' would have been placed, and back down to 'W D 16' which is just to the east of Doe Tor. It was possible that the Duchy of Cornwall disputed the ownership of the 330 acres of land covered by these three stones and that 'W D 17' was removed from the moor as a result. (Source: Dave Brewer's 'Dartmoor Boundary Markers', pages 212-216). 6) Doetor Brook Water Intake (SX5411/8517) & Falls (SX535/851)
Three
leats formerly wound their way from the left bank of this section of the
brook. The first (upper) was for the medieval tin-works at Walla Brook
Head, the next delivered water through Doe Tor’s western clitter to a
point above the head-weir for the Wheal Jewel leat, again on the Walla
Brook, and the lowest took pot-water to Doe Tor Farm (Doter Green circa
1694). Near a rounded corner of the western boundary hedge of this
farm’s enclosures is an abandoned and part-finished apple crusher - 3
feet 5 inches diameter, 7½ inches thick with a 6½ inch square central
aperture.
|
| May 2018 - Shilstone Tor |
|
1) Kennon Hill
Settlement - (SX6419/8906)
This multiple enclosure settlement lies on the southern slopes of Kennon Hill leading down to Ruelake Pit. The boundary walls are continuous and don't appear to have been robbed by the stone cutter. At least fourteen huts can be counted, each 3 to 4 metres in diameter, and are connected to each other by a network of banks which form paddocks between them. There is another isolated hut about 200 metres to the south of the settlement and traces of other unconnected enclosures near the summit of Kennon Hill and in the hollow between Kennon Hill and Rival Tor. A reave from the Gallaven Brook runs to the south of the enclosure, through the Whitemoor Marsh and around the head of the Forder Brook. This appears to separate the Kennon Settlement from the prehistoric enclosures on Buttern Hill. (Source: Jeremy Butler's 'Dartmoor Atlas of Antiquities Volume 2 - The North', page 211). 2) Buttern Hill Stone Circle - (SX6494/8847) With a diameter of 24.8 metres, this stone circle is only slightly smaller than its near neighbour at Scorhill. Unlike the Scorhill circle, this one has not been restored and the recumbent stones still lay in the position that each one has fallen. The largest stone lies on the south west side and measures 2.05 metres long but, similar to a number of the others, it has been worked on in the past by a stone cutter. Estimated from the position of the current stones, it is thought that the circle would originally have consisted of around forty stones. Of the twenty three stones that still remain, only five are still standing and the others lay in the same position as they fell, either on or beneath the moorland surface. The tallest of the five remaining standing stones is 0.6 metres in height and is of an unusual, but entirely natural, shape. R. N. Worth, in 1894, recorded a small cairn positioned about 6 metres inside the southern edge of the circle. He also recorded a second stone circle, consisting of four or five stones with a 20 metre diameter set around a central menhir, up the slope to the westward. There appears to be no trace of either of these features visible today. (Source: Jeremy Butler's 'Dartmoor Atlas of Antiquities Volume 2 - The North', page 194).
|
| April 2018 - Two Bridges |
|
1) Wistman's Warren - (SX6115/7779) A sporting rabbit warren was established on the western slopes of Longaford Tor in 1895, by the tenant of Powder Mills Farm - James Saltroun. The low walls of the warrener's house and the outline of the garden can be seen at the northern end of Wistman's Wood. The stone foundation walls of the house measure forty feet by twenty four and a wooden house, or shack, was built on these foundations. The warren was run by gamekeeper, James Rooke, and although the rabbits were mainly shot for sport, the gamekeeper would sell the meat on to butcher, Dickie Dodd of Tavistock, who would visit the warren on a weekly basis to make his purchases. The gamekeeper also kept a pet hare which could always be seen bounding around the shack and garden. At least twenty-six rabbit buries are interspersed with the stone-age huts on the hillside above the warrener's house. The majority of these buries are long mounds oriented down the slope but a few, near the centre, are round and similar to cairns but distinguished from them by an encircling ditch. The warren was very short lived and was operational for only a few years, at which time James Rooke joined the prison service in Princetown. (Source: Jeremy Butler's 'Dartmoor Atlas of Antiquities Volume 2 - The North', page 60 & Eric Hemery's 'High Dartmoor', pages 455/6). 2) Higher White Tor Double Stone Row - (SX619/783) Only twelve stones of this double stone row remain in place, rather less than the twenty-one recorded by the Dartmoor Exploration Committee in 1898. Some have fallen since then and twenty-four can now be found lying flat, many of them covered by turf. Originally, it probably had a cairn at the upper end but no trace of this now remains. It is likely that the cairn was very close to the present end of the rows, as a short distance uphill some large earth-fast blocks interrupt the alignment. The lower terminus is also indeterminate and the present length of 95.4 metres must be only a fraction of the original. The surrounding hillside seems to have been swept clear of small surface stones and the damage to the monument may well have been caused by the builders of the nearby newtake wall. The rows are set about 1.4 metres apart but too few stones remain to estimate the intervals along the rows. (Source: Jeremy Butler's 'Dartmoor Atlas of Antiquities Volume 2 - The North', page 65). 3) Crow Tor Kist - (SX6052/7868)
|
| February 2018 - North Bovey |
|
1) North Bovey Village Cross - (SX7399/8388) Information about the North Bovey Village Cross can be found on our Dartmoor Crosses website. 2) Hele Cross - (SX7213/8417) Information about the Hele Cross can be found on our Dartmoor Crosses website.
|
| January 2018 - Scorriton |
|
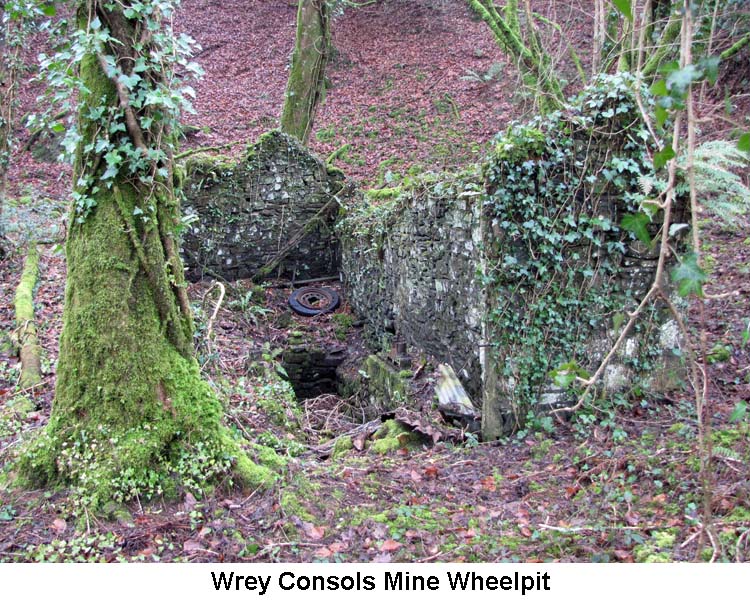
1) Holne Churchyard Crosses - (SX7059/6948) Information about the Holne Churchyard Cross and the nearby War Memorial Cross can be found on our Dartmoor Crosses website. 2) Wrey Consols Mine Wheelpit - (SX7161/6839)
Today there is little left of the mine apart from the wheel-pit, some partially filled shafts and a few adits but back in the 1850s this would have been a bustling copper mine. Today the mine adits are a roost for some lesser horseshoe bats and the nearby Hawson Court is a roost for greater horseshoe bats. (Source: Legendary Dartmoor Website). 3) Hawson's Cross & Stumpy Oak Tree - (SX7106/6817) Information about Hawson's Cross and the old hollow oak tree beside it can be found on our Dartmoor Crosses website.
|